POWER WINDOW REGULATOR MOTOR (for Sedan Rear Side) > INSTALLATION |

| 1. INSTALL POWER WINDOW REGULATOR MOTOR ASSEMBLY REAR |
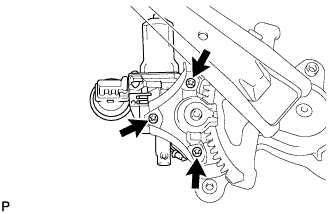 |
Apply MP grease to the sliding and rotating areas of the regulator motor.
Using "TORX" socket wrench T25, install the power window regulator motor with the 3 screws.
- Torque:
- 5.4 N*m{ 55 kgf*cm , 48 in.*lbf }
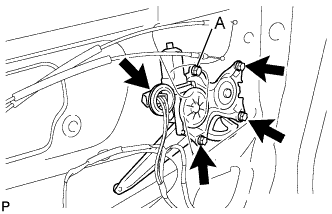
| 2. INSTALL REAR DOOR WINDOW REGULATOR SUB-ASSEMBLY |
w/ Power window:
Apply MP grease to the sliding and rotating areas of the rear door window regulator.
- NOTICE:
- Do not apply grease to the window regulator spring.
Loosely screw bolt A onto the rear door window regulator.
Insert the rear door window regulator into the door panel. Use bolt A to hang the rear door window regulator on the door panel.
- NOTICE:
- Do not drop the window regulator as it may be damaged.
Install the rear door window regulator with the 4 bolts, and tighten bolt A.
- Torque:
- 8.0 N*m{ 82 kgf*cm , 71 in.*lbf }
Connect the connector.
w/o Power window:
Apply MP grease to the sliding and rotating areas of the rear door window regulator.
- NOTICE:
- Do not apply grease to the window regulator spring.
Install the rear door window regulator with the 3 bolts.
- Torque:
- 8.0 N*m{ 82 kgf*cm , 71 in.*lbf }

| 3. INSTALL REAR DOOR GLASS SUB-ASSEMBLY |
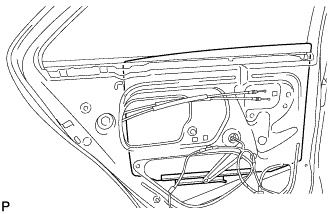 |
w/ Power window:
Install the rear door glass onto the rear door window regulator.
w/o Power window:
Install the rear door glass onto the rear door window regulator.
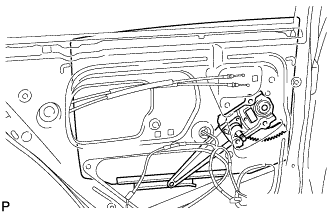 |
| 4. INSTALL REAR DOOR WINDOW DIVISION BAR SUB-ASSEMBLY |
 |
Install the rear door window division bar with the 2 bolts and screw.
- Torque:
- 6.2 N*m{ 63 kgf*cm , 54 in.*lbf }
| 5. INSTALL REAR DOOR GLASS RUN |
 |
Install the rear door glass run.
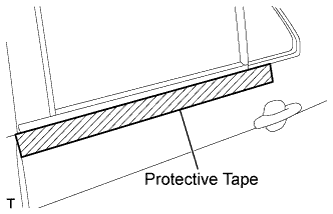
| 6. INSTALL REAR DOOR BELT MOULDING |
Engage the 5 claws and install a new rear door belt moulding.
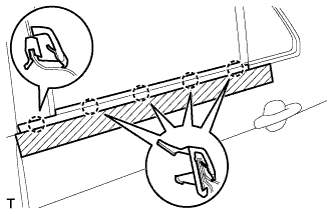 |
Remove the protective tape.
 |
| 7. INSTALL REAR DOOR WEATHERSTRIP |
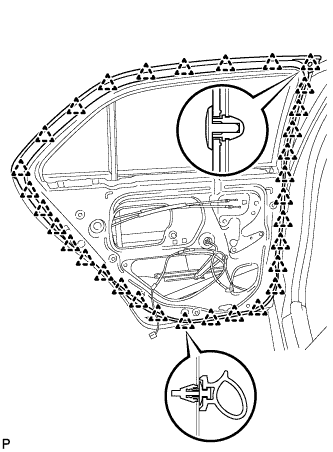 |
Engage the 32 clips and install the rear door weatherstrip.
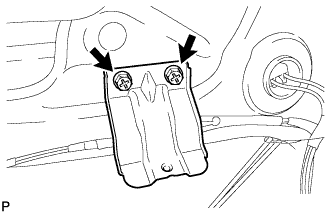
| 8. INSTALL REAR DOOR CHECK ASSEMBLY |
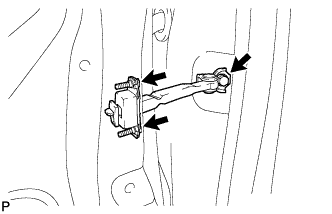 |
Apply MP grease to the sliding areas of the door check.
Install the rear door check onto the door panel with the 2 bolts.
- Torque:
- 5.5 N*m{ 56 kgf*cm , 49 in.*lbf }
Apply adhesive to the threads of the bolt.
- Adhesive:
- Toyota Genuine Adhesive 1324, Three Bond 1324 or the equivalent.
Install the rear door check onto the body panel with the bolt.
- Torque:
- 30 N*m{ 306 kgf*cm , 22 ft.*lbf }
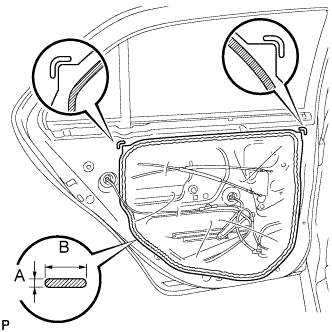
| 9. INSTALL REAR DOOR SERVICE HOLE COVER |
Apply butyl tape to the door panel, then install the rear door service hole cover as shown in the illustration.
- Specification:
Area Dimension A 2.0 mm (0.079 in.) or more B 6.0 mm (0.236 in.) or more
- HINT:
- When installing the service hole cover, pull the links and connectors out through the service hole.
- There should be no wrinkles or folds after attaching the service hole cover.
- After attaching the service hole cover, check the quality of the seal.
 |
| 10. INSTALL REAR DOOR TRIM BRACKET |
Install the rear door trim bracket with the 2 screws.
 |
| 11. INSTALL REAR DOOR TRIM BOARD SUB-ASSEMBLY |
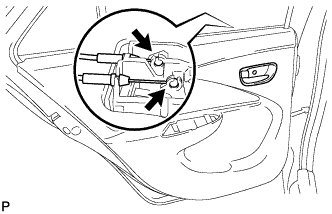 |
Connect the rear door lock remote control cable and rear door inside locking cable.
Engage the 7 clips and install the rear door trim board.
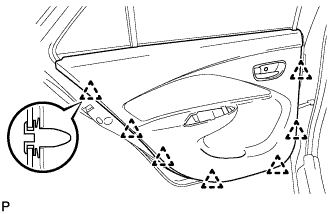 |
Tighten the screw.
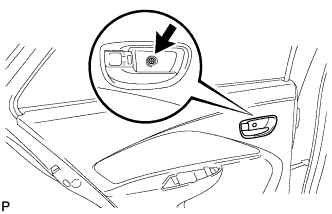 |
| 12. INSTALL REAR DOOR ARMREST BASE UPPER PANEL |
 |
Engage the 4 claws and install the rear door armrest base upper panel.
Install the screw.
| 13. CONNECT CABLE TO NEGATIVE BATTERY TERMINAL |
- Torque:
- 5.4 N*m{ 55 kgf*cm , 48 in.*lbf }