WASHER LEVEL WARNING SWITCH (for Sedan) > REMOVAL |

| 1. DISCONNECT CABLE FROM NEGATIVE BATTERY TERMINAL |
| 2. REMOVE FRONT SPOILER COVER (w/ Front Spoiler) |
Remove the 2 screws, the 10 bolts and the front spoiler cover.
 |
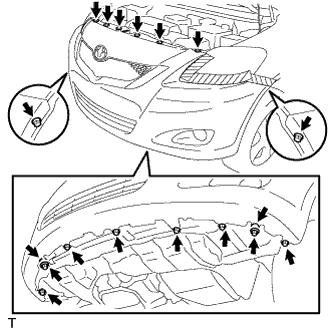
| 3. REMOVE FRONT BUMPER COVER (w/ Large Front Spoiler) |
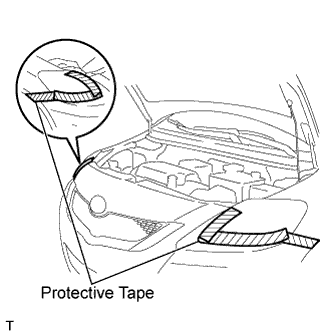
Apply protective tape, as shown in the illustration.
 |
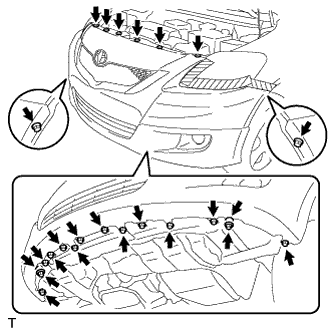
Remove the 9 bolts and the 7 screws.
 |
Remove the 2 screw grommets.
Remove the 6 clips.
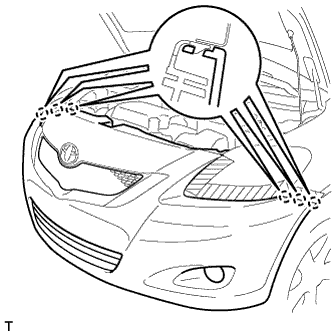
Disengage the 6 claws and remove the front bumper cover.
 |
Disconnect the connectors.
- HINT:
- If the vehicle is equipped with fog lights, disconnect the connector.
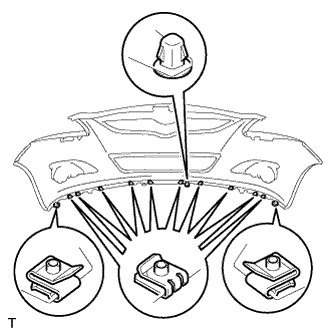
Remove the 2 clips, the screw grommet and the 6 spring nuts.
 |
| 4. REMOVE FRONT BUMPER COVER (w/ Small Front Spoiler) |
Apply protective tape, as shown in the illustration.
|
Remove the 5 screws and the 3 bolts.
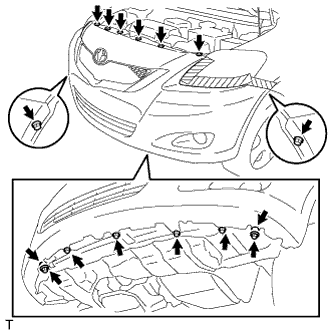 |
Remove the 2 screw grommets.
Remove the 6 clips.
Disengage the 6 claws and remove the front bumper cover.
|
Disconnect the connectors.
- HINT:
- If the vehicle is equipped with fog lights, disconnect the connectors.
Remove the 2 clips, the screw grommet and the 10 spring nuts.
 |
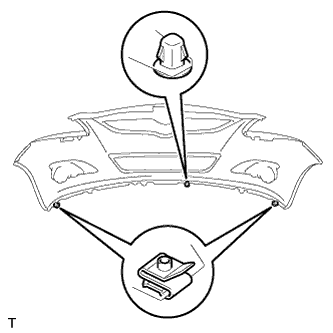
| 5. REMOVE FRONT BUMPER COVER (w/o Front Spoiler) |
Apply protective tape, as shown in the illustration.
|
Remove the 7 screws and the 3 bolts.
 |
Remove the 2 screw grommets.
Remove the 6 clips.
Disengage the 6 claws and remove the front bumper cover.
|
Disconnect the connectors.
- HINT:
- If the vehicle is equipped with fog lights, disconnect the connectors.
Remove the 2 clips and the screw grommet.
 |
| 6. REMOVE HEADLIGHT ASSEMBLY RH |
- HINT:
- Use the same procedure as for the LH side (Click here).
| 7. DRAIN WASHER FLUID |
Disconnect the washer hose from the windshield washer motor and pump, and drain the washer fluid.
| 8. REMOVE WINDSHIELD WASHER JAR ASSEMBLY |
Disconnect the 2 harness clamps.
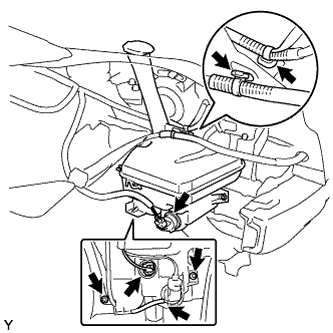 |
Disconnect the 2 connectors.
Remove the 2 bolts.
Remove the windshield washer jar.
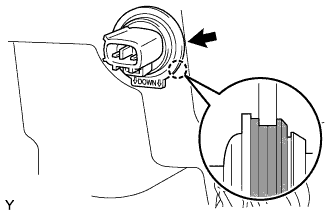
| 9. REMOVE WASHER LEVEL WARNING SWITCH |
Pull the washer motor and pump out of the packing of the washer jar.
 |