AIR CONDITIONING PANEL (for Sedan) > REMOVAL |

| 1. DISCONNECT CABLE FROM NEGATIVE BATTERY TERMINAL |
| 2. REMOVE INSTRUMENT PANEL FINISH PANEL LOWER CENTER |
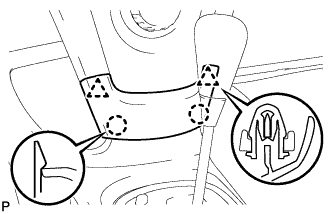 |
Disengage the 2 claws and 2 clips and remove the instrument panel finish panel lower center.
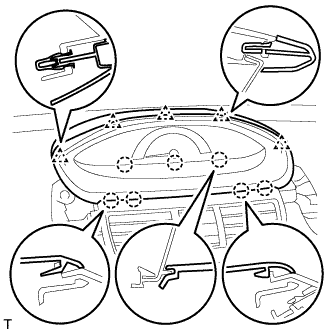
| 3. REMOVE INSTRUMENT PANEL FINISH PANEL END LH |
 |
Disengage the 6 claws and 3 clips and remove the instrument panel finish panel end LH.
| 4. REMOVE INSTRUMENT PANEL FINISH PANEL END RH |
 |
Disengage the 6 claws and 3 clips and remove the instrument panel finish panel end RH.
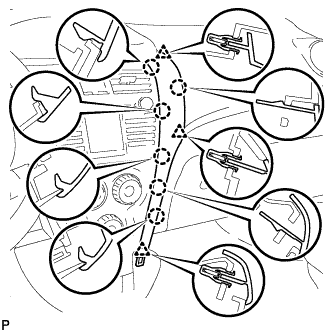
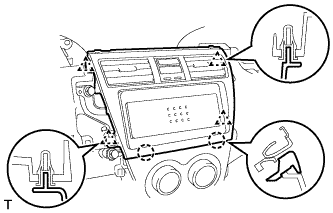
| 5. REMOVE INSTRUMENT CLUSTER FINISH PANEL NO.1 |
 |
Disengage the 7 claws and 5 clips and remove the instrument cluster finish panel.
| 6. REMOVE RADIO RECEIVER ASSEMBLY (for Integrated with Panel) |
for Integrated with Panel:
Disconnect the hazard warning signal switch connector.
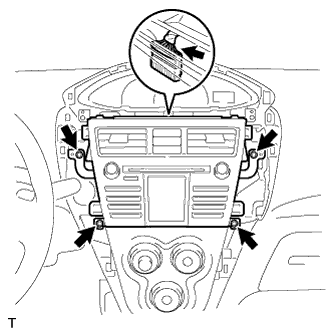
Remove the 4 bolts.
Disengage the 4 clips and the 4 claws and remove the radio receiver.
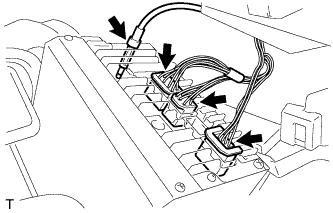
Disconnect the plug.
Disconnect the 3 radio connectors.
 |
except Integrated with Panel:
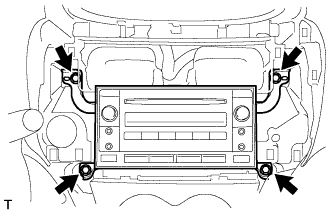
Remove the 4 bolts and the radio receiver.
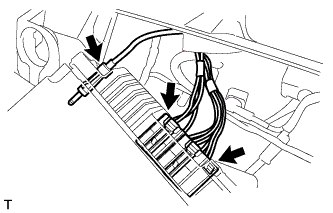
Disconnect the plug.
Disconnect the 2 radio connectors.
 |
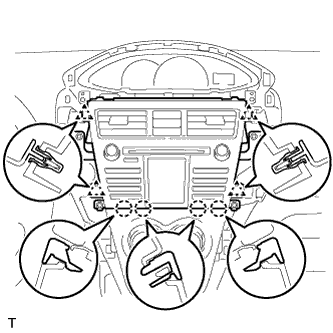
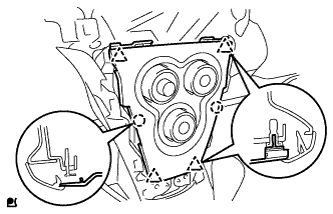
| 7. REMOVE INSTRUMENT CLUSTER FINISH PANEL CENTER SUB-ASSEMBLY |
 |
Disengage the 2 claws and 4 clips and remove the instrument cluster finish panel center.
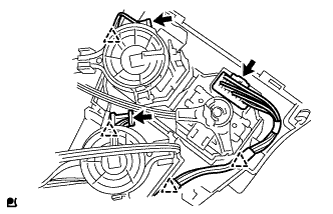
| 8. REMOVE AIR CONDITIONING PANEL ASSEMBLY |
 |
Disengage the 4 clips and 2 claws and remove the air conditioning panel.
Disconnect the 3 connectors and 4 clamps.
 |
| 9. DISCONNECT AIR MIX DAMPER CONTROL CABLE SUB-ASSEMBLY |
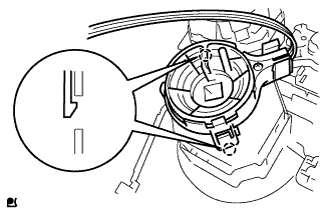 |
Disconnect the air mix damper control cable from the clamp.
Disengage the 2 claws and disconnect the air mix damper control cable.
| 10. DISCONNECT DEFROSTER DAMPER CONTROL CABLE SUB-ASSEMBLY |
 |
Disengage the 2 claws and disconnect the defroster damper control cable.
| 11. DISCONNECT AIR INLET DAMPER CONTROL CABLE SUB-ASSEMBLY |
 |
Disengage the 2 claws and disconnect the air inlet damper control cable.