FRONT CRANKSHAFT OIL SEAL > REMOVAL |

for Preparation Click here
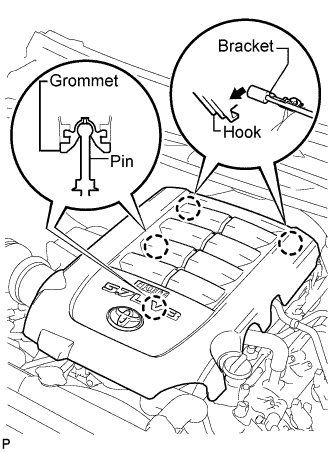
| 1. REMOVE V-BANK COVER SUB-ASSEMBLY |
Raise the front of the V-bank cover to detach the 2 pins. Then remove the 2 V-bank cover hooks from the bracket, and remove the V-bank cover.
 |
| 2. REMOVE NO. 1 ENGINE UNDER COVER |
Remove the 3 screws and 5 bolts.
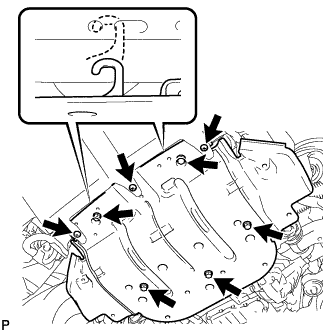 |
Unhook the engine under cover from the vehicle body as shown in the illustration.
| 3. DRAIN ENGINE COOLANT |
- CAUTION:
- Do not remove the radiator cap while the engine and radiator are still hot. Pressurized, hot engine coolant and steam may be released and cause serious burns.
- HINT:
- Collect the coolant in a container and dispose of it according to the regulations in your area.
Loosen the radiator drain cock plug.
Remove the radiator cap. Then drain the coolant from the radiator.
Loosen the 2 cylinder block drain cock plugs. Then drain the coolant from the engine.
Tighten the 2 cylinder block drain cock plugs.
- Torque:
- 13 N*m{ 133 kgf*cm , 10 ft.*lbf }
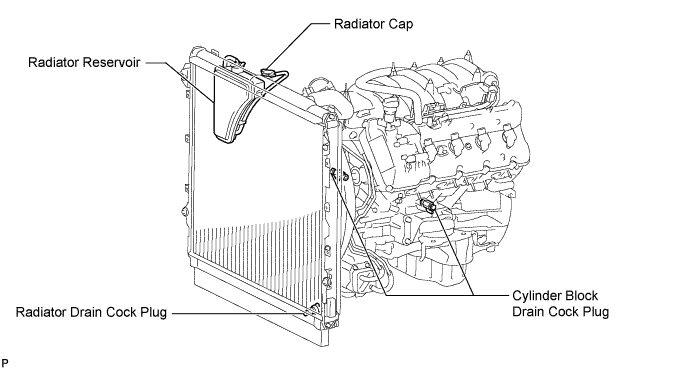
Tighten the radiator drain cock plug by hand.
| 4. REMOVE INLET RADIATOR HOSE |
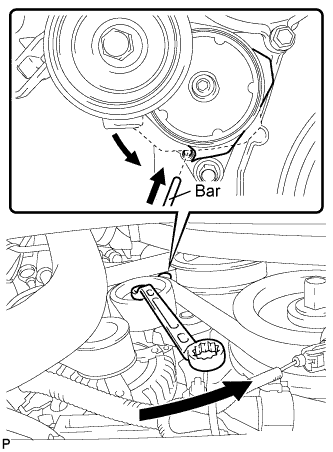
| 5. REMOVE FAN & GENERATOR V BELT |
While turning the belt tensioner counterclockwise, align the service hole for the belt tensioner and the belt tensioner fixing position, and then insert a bar of φ 5 mm (0.197 in.) into the service hole to fix the belt tensioner in place.
- HINT:
- The pulley bolt for the belt tensioner has a left-hand thread.
 |
Remove the V belt.
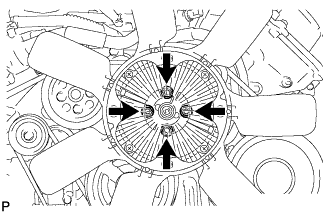
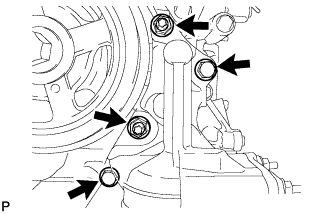
| 6. REMOVE FAN SHROUD |
Loosen the 4 nuts holding the fluid coupling fan.
 |
Remove the fan and generator V-belt.
Disconnect the reservoir hose from the upper radiator tank.
Remove the 2 bolts holding the fan shroud.
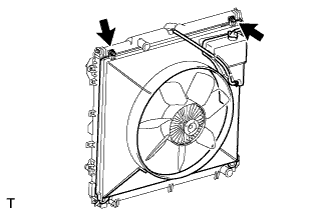 |
Remove the 4 nuts of the fluid coupling fan, and then remove the shroud together with the coupling fan.
- NOTICE:
- Be careful not to damage the radiator core.
Remove the fan pulley from the fan bracket.
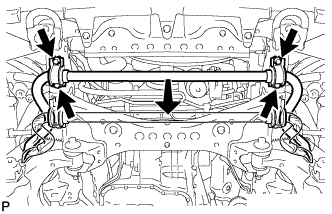
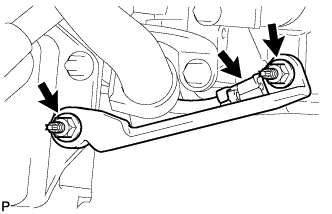
| 7. DISCONNECT FRONT STABILIZER BAR |
Remove the 4 bolts, 2 stabilizer brackets and 2 stabilizer bushes. Then disconnect the stabilizer bar.
 |
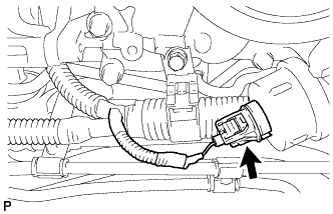
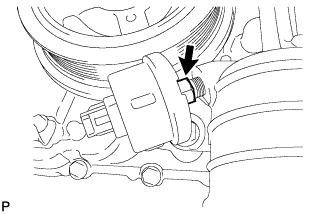
| 8. REMOVE OIL PRESSURE SENDER GAUGE ASSEMBLY |
Disconnect the sender gauge connector.
 |
Remove the oil pressure sender gauge.
 |
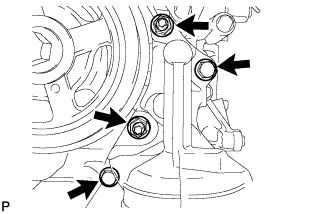
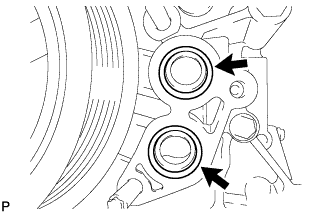
| 9. REMOVE OIL FILTER BRACKET SUB-ASSEMBLY (w/o Oil Cooler) |
Remove the 2 bolts, 2 nuts and oil filter bracket.
 |
Remove the 2 O-rings.
 |
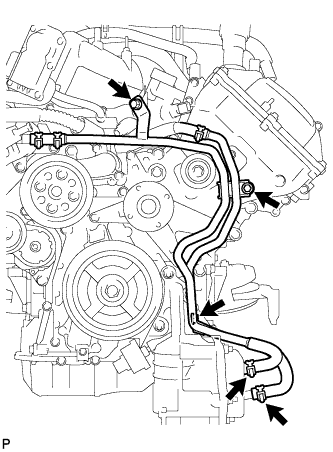
| 10. DISCONNECT NO. 2 WATER BY-PASS PIPE SUB-ASSEMBLY (w/ Oil Cooler) |
Remove the 3 bolts and disconnect the 2 water by-pass hoses from the oil cooler.
 |
| 11. REMOVE NO. 1 OIL COOLER BRACKET (w/ Oil Cooler) |
Remove the 2 nuts and bracket.
 |
Disconnect the ground wire from the cylinder block.
| 12. REMOVE OIL FILTER BRACKET SUB-ASSEMBLY (w/ Oil Cooler) |
Remove the 2 bolts, 2 nuts and filter bracket.
 |
Remove the 2 O-rings.
|
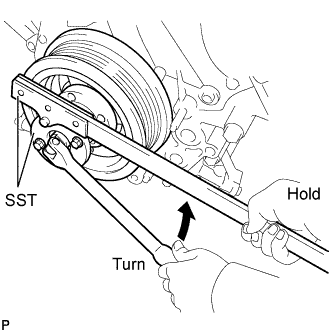
| 13. REMOVE CRANKSHAFT PULLEY |
Using SST, loosen the crankshaft pulley set bolt.
- SST
- 09213-70011
09330-00021
 |
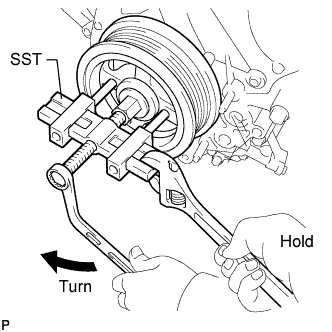
Partially install the pulley set bolt to the crankshaft until 2 or 3 threads are engaged.
Using the pulley set bolt and SST, remove the crankshaft pulley.
- SST
- 09950-50013
(09951-05010, 09952-05010, 09953-05010, 09954-05011)
 |
| 14. REMOVE CRANKSHAFT TIMING GEAR KEY |
Remove the crankshaft timing gear key from the crankshaft.
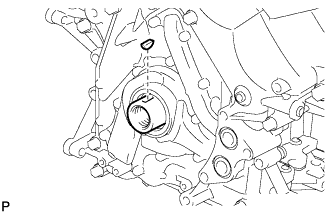 |
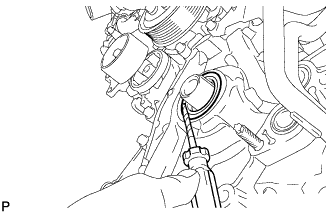
| 15. REMOVE FRONT CRANKSHAFT OIL SEAL |
Using a screwdriver, pry out the oil seal.
- HINT:
- Tape the screwdriver tip before use.
- NOTICE:
- Do not damage the surface of the oil seal press fit hole and crankshaft.
 |