REAR NO. 1 SEAT ASSEMBLY (for RH Side) > DISASSEMBLY |

for Preparation Click here
- CAUTION:
- Wear protective gloves. Sharp areas on the seatback frame, seat cushion frame and reclining adjuster may injure your hands.
| 1. REMOVE REAR SEAT HEADREST ASSEMBLY |
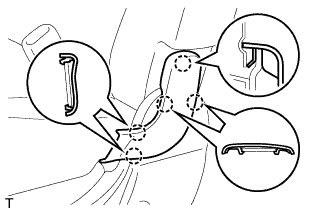
| 2. REMOVE REAR NO. 2 SEAT CUSHION HINGE COVER |
Return the seatback to the upright position.
Using a screwdriver, detach the 5 claws and remove the hinge cover.
- HINT:
- Tape the screwdriver tip before use.
 |
| 3. REMOVE REAR NO. 1 SEAT CUSHION HINGE COVER |
- HINT:
- Use the same procedures described for the rear No. 2 seat cushion hinge cover.
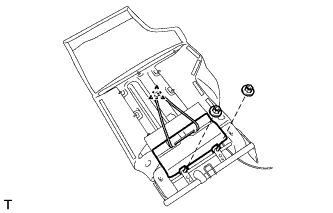
| 4. REMOVE REAR SEAT INNER BELT ASSEMBLY RH |
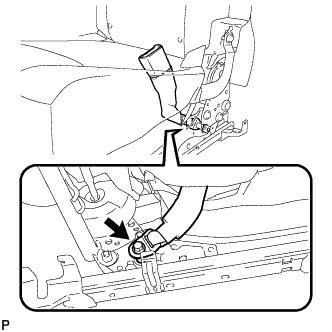 |
Remove the bolt and the seat belt.
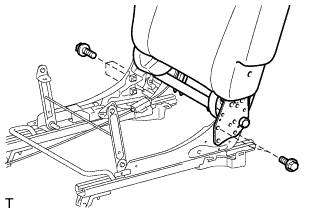
| 5. REMOVE REAR NO. 1 SEAT CUSHION ASSEMBLY RH |
Disconnect the rubber band of the seatback cover from the seat cushion frame.
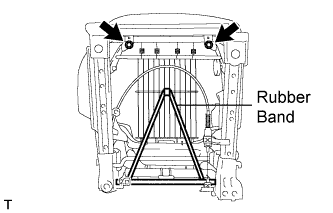 |
Remove the 2 bolts.
Remove the 2 bolts, 2 bushes and cushion.
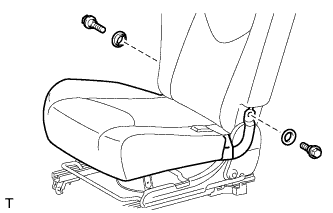 |
| 6. REMOVE REAR NO. 1 SEAT CUSHION COVER |
Detach the 2 hooks.
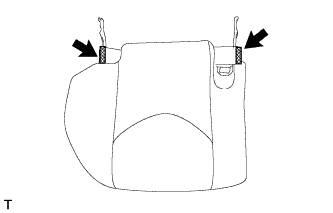 |
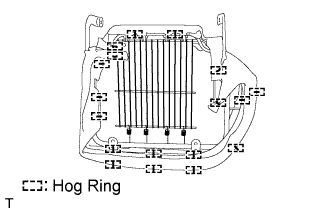
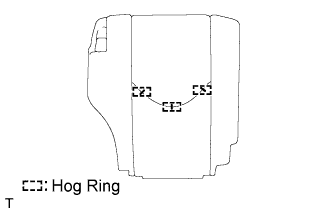
Remove the 18 hog rings and seat cushion cover (with pad) from the seat cushion frame.
 |
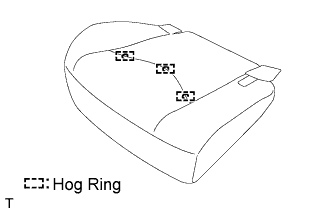
Remove the 3 hog rings and seat cushion cover from the seat cushion pad.
 |
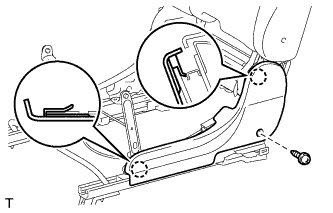
| 7. REMOVE REAR SEAT REAR BRACKET COVER RH |
Open the lower part of the seatback cover. Then remove the 2 screws.
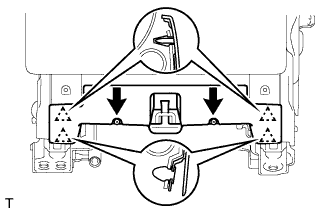 |
Using a screwdriver, detach the 4 clips and remove the bracket cover.
- HINT:
- Tape the screwdriver tip before use.
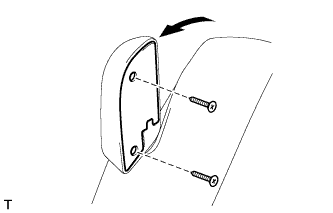
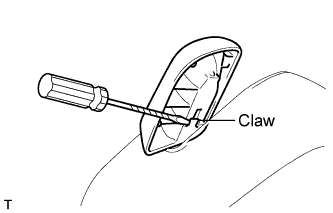
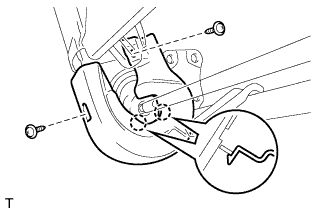
| 8. REMOVE REAR SEAT CUSHION REAR MOULDING RH |
Remove the screw.
 |
Detach the 2 claws and remove the moulding.
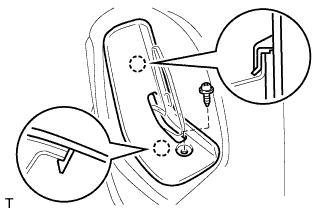
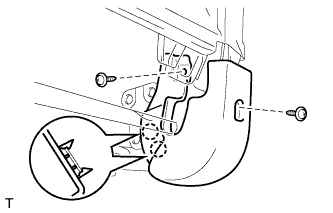
| 9. REMOVE REAR SEAT CUSHION MOULDING RH |
- HINT:
- Use the same procedures described for the rear seat cushion rear moulding RH.
| 10. REMOVE REAR SEAT RECLINING RELEASE LEVER |
Pull the reclining control lever to reveal the 2 screws. Then remove the 2 screw and cover.
 |
Using a screwdriver, detach the claw and remove the release lever.
 |
| 11. REMOVE REAR SEATBACK LOCK CONTROL LEVER BASE RH |
Remove the screw.
 |
Using a screwdriver, detach the 2 claws and remove the lever base.
- HINT:
- Tape the screwdriver tip before use.
| 12. REMOVE REAR NO. 1 SEATBACK ASSEMBLY RH |
Detach the 2 clamps and disconnect the cable from the reclining adjuster.
 |
Remove the 5 bolts and seatback.
|
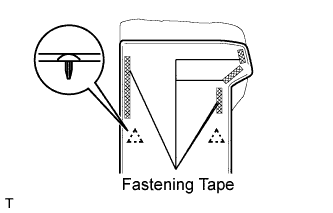
| 13. REMOVE REAR SEATBACK PROTECTOR |
Using a clip remover, detach the 5 clips and open the fastening tape.
- NOTICE:
- If clips are damaged during removal, replace them.
 |
Detach the clip.
 |
Remove the 2 nuts and protector.
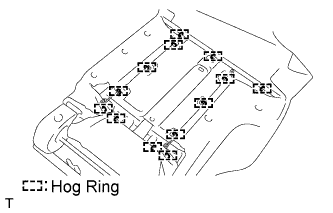
| 14. REMOVE REAR NO. 1 SEATBACK COVER |
Remove the 13 hog rings.
 |
Detach the 4 claws and remove the 2 headrest supports.
 |
Remove the seatback cover (with pad) from the seatback frame.
Remove the 3 hog rings and seatback cover from the seatback pad.
 |
| 15. REMOVE REAR SEATBACK COVER RH |
Remove the 2 screws.
 |
Using a screwdriver, detach the 2 claws and remove the cover.
- HINT:
- Tape the screwdriver tip before use.
| 16. REMOVE REAR SEAT COVER |
Remove the 2 screws.
 |
Using a screwdriver, detach the 2 claws and remove the cover.
- HINT:
- Tape the screwdriver tip before use.