DOOR CONTROL RECEIVER (for Long Body) > REMOVAL |

for Preparation Click here
| 1. REMOVE REAR DOOR SCUFF PLATE RH |
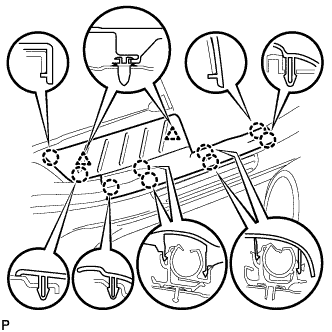 |
Using a screwdriver, detach the 9 claws.
- HINT:
- Tape the screwdriver tip before use.
Using a clip remover, detach the 2 clips and remove the garnish.
| 2. REMOVE REAR DOOR OPENING TRIM WEATHERSTRIP RH |
Remove the rear door opening trim weatherstrip.
| 3. REMOVE REAR FLOOR NO. 1 BOARD |
Remove the rear floor No. 1 board.
| 4. REMOVE DECK BOARD ASSEMBLY |
Remove the deck board.
| 5. REMOVE REAR FLOOR NO. 3 BOARD |
Remove the rear floor No. 3 board.
| 6. REMOVE REAR FLOOR NO. 2 BOARD |
Remove the rear floor No. 2 board.
| 7. REMOVE REAR FLOOR NO. 1 MAT SUPPORT SIDE PLATE |
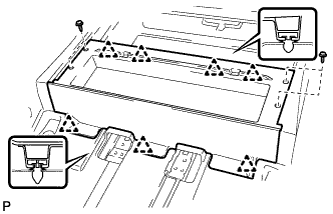 |
Remove the 4 screws.
Using a clip remover, detach the 7 clips and remove the plate.
| 8. REMOVE REAR FLOOR FINISH PLATE |
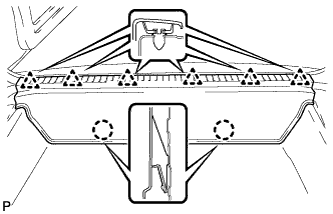 |
Using a clip remover, detach the 6 clips.
Detach the 2 claws and remove the finish plate.
| 9. REMOVE RECLINING REMOTE CONTROL LEVER BEZEL RH |
Using a screwdriver, detach the 6 claws and remove the bezel.
- HINT:
- Tape the screwdriver tip before use.
 |
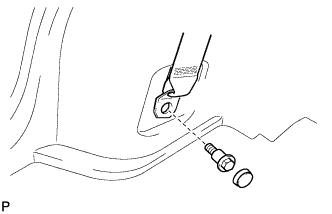
| 10. REMOVE TETHER ANCHOR BRACKET SUB-ASSEMBLY |
 |
Remove the bolt and tether anchor bracket.
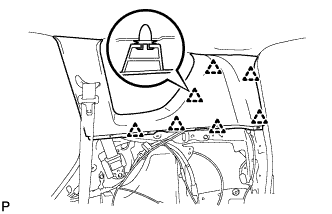
| 11. REMOVE DECK TRIM SIDE PANEL ASSEMBLY RH |
Disconnect the rear No.1 seat outer belt's floor anchor.
Remove the anchor cover.
Remove the bolt and disconnect the floor anchor.
 |
Remove the 2 screws and 2 bolts.
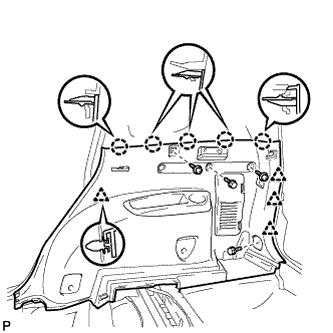 |
Using a screwdriver, detach the 5 claws.
- HINT:
- Tape the screwdriver tip before use.
Using a clip remover, detach the 4 clips and remove the trim board.
Remove the belt hanger.
| 12. REMOVE INNER ROOF SIDE GARNISH ASSEMBLY RH |
 |
Using a clip remover, detach the 7 clips and remove the garnish.
| 13. REMOVE DOOR CONTROL RECEIVER |
 |
Disconnect the receiver connector.
Remove the bolt and receiver.