EXHAUST HEAT RECIRCULATION SYSTEM > ON-VEHICLE INSPECTION |
for Preparation Click here
| 1. INSPECT FRONT EXHAUST PIPE ASSEMBLY |
Inspect the exhaust flow control valve operation.
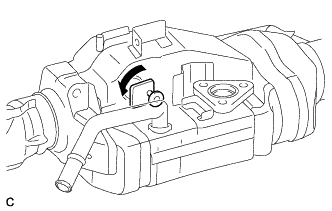
Remove the exhaust pipe gas control actuator (Click here).
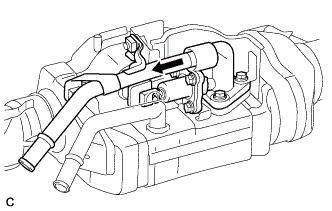
Using a screwdriver, move the exhaust flow control valve towards the bottom of the vehicle. Check that the valve moves smoothly.
- OK:
- Valve moves smoothly.
Install the exhaust pipe gas control actuator (Click here).

Inspect the exhaust pipe gas control actuator.
Connect the Techstream to the DLC3.
Turn the ignition switch to ON (IG).
Turn the Techstream on.
Enter the following menus: Powertrain / Engine and ECT / Data List / Coolant Temp.
While checking the engine coolant temperature with the Techstream, check the operation of the exhaust pipe gas control actuator rod when the temperature rises.
- Standard:
Condition Rod Operation Cold (below approx. 71°C (160°F)) → Warmed up (approx. 80°C (176°F) or higher) Rod gradually extends smoothly as the temperature rises
- HINT:
- After the engine has warmed up (the thermostat temperature is approximately 80°C (176°F) or higher), the rod should be extended approximately 5.7 mm (0.224 in.) or more compared to when the engine is cold (the thermostat temperature is below 71°C (160°F)).
- The coolant temperature shown in the Data List may slightly deviate from the thermostat temperature. This is because the Data List value indicates the temperature detected by the engine coolant temperature sensor, which is mounted on the engine, while the thermostat is positioned in the exhaust pipe gas control actuator.
- If it is difficult to check while the rod is operating, allow the engine to cool down until the coolant temperature matches the ambient temperature and then check the rod operation again.
Check for any cracks or damage on the exhaust pipe gas control actuator rod.
- OK:
- No cracks or damage is found.

| 2. INSPECT FOR ENGINE COOLANT LEAK FROM FRONT EXHAUST PIPE ASSEMBLY |
- NOTICE:
- Before performing each inspection, turn the A/C switch off.
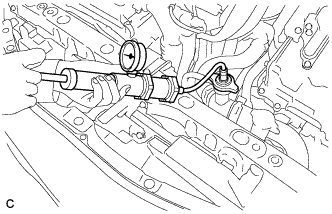
Fill the radiator with coolant and attach a radiator cap tester.
 |
Put the engine in inspection mode (Click here).
Warm up the engine.
Using a radiator cap tester, increase the pressure inside the radiator to 108 kPa (1.1 kgf/cm2, 16 psi), and check that the pressure does not drop.
If the pressure drops, check the hoses, radiator, engine water pump, front exhaust pipe assembly and engine coolant temperature sensor for leaks. If no external leaks are found, check the heater core, cylinder block and cylinder head.
