REAR CRANKSHAFT OIL SEAL > REMOVAL |

for Preparation Click here
| 1. REMOVE HYBRID VEHICLE TRANSAXLE ASSEMBLY |
- NOTICE:
- Be careful not to apply excess force to the transmission input damper assembly when removing or installing the hybrid vehicle transaxle assembly. If excess force is applied, the transmission input damper assembly may be damaged, or its splines may become misaligned.
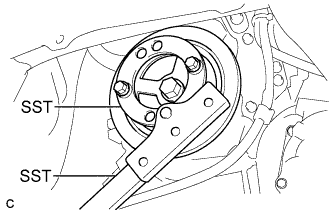
| 2. REMOVE TRANSMISSION INPUT DAMPER ASSEMBLY |
Using SST, hold the crankshaft damper sub-assembly.
- SST
- 09213-58012
(91111-50845)
09330-00021
 |
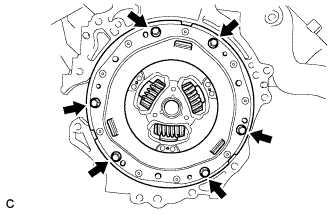
Remove the 6 bolts and transmission input damper assembly from the flywheel sub-assembly.
 |
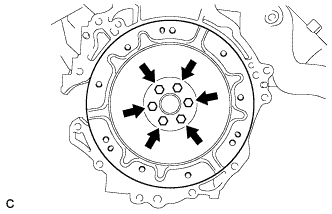
| 3. REMOVE FLYWHEEL SUB-ASSEMBLY |
Using SST, hold the crankshaft damper sub-assembly.
- SST
- 09213-58012
(91111-50845)
09330-00021
|
Remove the 6 bolts and flywheel sub-assembly.
 |
| 4. REMOVE REAR ENGINE OIL SEAL |
Using a knife, cut off the lip of the rear engine oil seal.
Text in Illustration *1 Protective Tape *a Cut Position
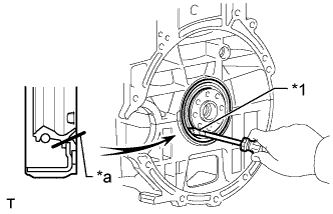 |
Using a screwdriver with its tip wrapped with tape, pry out the rear engine oil seal.
- NOTICE:
- Do not damage the surface of the oil seal press fit hole or the crankshaft.
- HINT:
- Wrap the screwdriver tip with protective tape before use.
- After removing, check the crankshaft for damage. If damaged, smooth the surface with 400-grit sandpaper.