HOOD LOCK CONTROL CABLE ASSEMBLY > INSTALLATION |

for Preparation Click here
| 1. INSTALL HOOD LOCK CONTROL CABLE ASSEMBLY |
Pass the hood lock control cable assembly into the engine compartment.
Pass the cable through the upper radiator support.
Engage the hood lock control cable assembly to the 3 clamps and grommet to connect the hood lock control cable assembly.
| 2. INSTALL HOOD LOCK CONTROL LEVER SUB-ASSEMBLY |
Connect the hood lock control cable assembly to the hood lock control lever sub-assembly.
Engage the 3 claws to install the hood lock control lever sub-assembly.
| 3. INSTALL HOOD LOCK ASSEMBLY |
Apply MP grease to the sliding areas of the hood lock assembly.
Connect the hood lock control cable.
Install the hood lock with the 3 bolts.
- Torque:
- 7.5 N*m{ 76 kgf*cm , 66 in.*lbf }
| 4. INSTALL COWL SIDE TRIM BOARD LH |
Engage the clip.
Install the cowl side trim board with the clip.
| 5. INSTALL FRONT DOOR SCUFF PLATE LH |
Engage the 8 claws to install the front door scuff plate.
| 6. INSPECT HOOD SUB-ASSEMBLY |
Check that the clearance measurements of areas "a" through "f" are within each standard range.
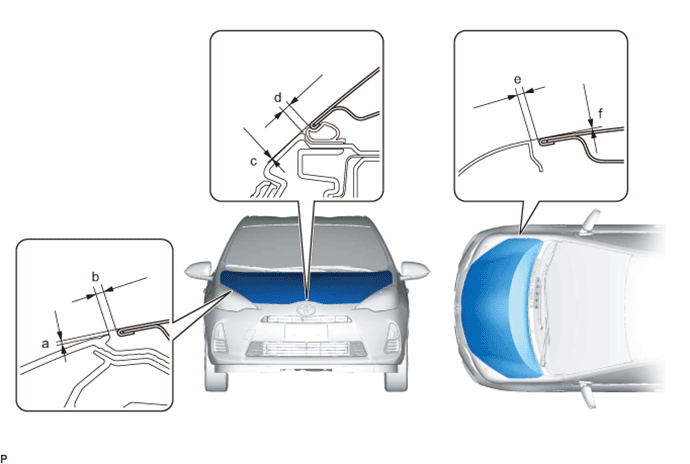
Standard Clearance Area Measurement Area Measurement a -0.85 to 3.15 mm (-0.0335 to 0.124 in.) b 1.65 to 5.65 mm (0.0650 to 0.222 in.) c -1.85 to 2.15 mm (-0.0728 to 0.0847 in.) d 2.35 to 6.35 mm (0.0925 to 0.250 in.) e 2.0 to 5.0 mm (0.0787 to 0.197 in.) f -1.5 to 1.5 mm (-0.0591 to 0.0591 in.)
| 7. ADJUST HOOD SUB-ASSEMBLY |
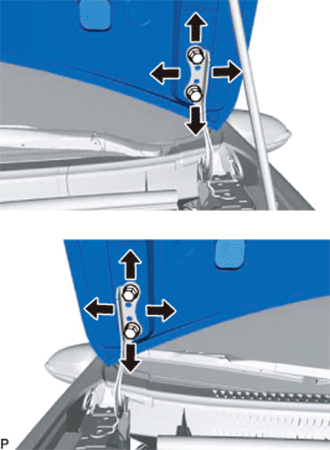
Horizontally and vertically adjust the hood.
Loosen the 4 hinge bolts of the hood.
Adjust the clearance between the hood and front fender by moving the hood.
Tighten the 4 hinge bolts after the adjustment.
- Torque:
- 13 N*m{ 133 kgf*cm , 10 ft.*lbf }
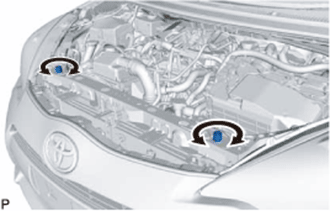
Adjust the height of the front end of the hood using the cushion rubbers.
Adjust the 2 cushion rubbers so that the heights of the hood and fender are aligned.
- HINT:
- Raise or lower the front end of the hood by turning the 2 cushion rubbers.
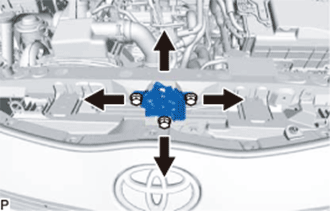
Adjust the hood lock.
Loosen the 3 bolts.
Tighten the bolts after adjustment.
- Torque:
- 7.5 N*m{ 76 kgf*cm , 66 in.*lbf }
Check that the striker can engage with the hood lock smoothly.
| 8. INSTALL FRONT FENDER LINER LH |
- HINT:
- Use the same procedure for the RH side and LH side (Click here).