RADIO RECEIVER > INSTALLATION |
for Preparation Click here
| 1. INSTALL NO. 2 RADIO RECEIVER BRACKET (for Radio and Display Type) |
Install the No. 2 radio bracket to the radio receiver with the 3 screws.
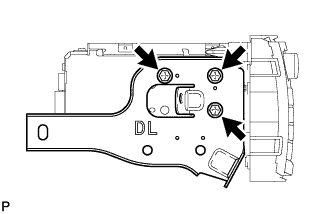 |
| 2. INSTALL NO. 2 RADIO BRACKET (for Radio Receiver Type) |
Install the No. 2 radio bracket to the radio receiver with the 3 screws.
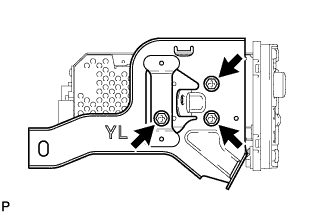 |
| 3. INSTALL NO. 1 RADIO RECEIVER BRACKET (for Radio and Display Type) |
Install the No. 1 radio bracket to the radio receiver with the 3 screws.
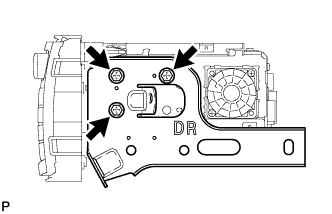 |
| 4. INSTALL NO. 1 RADIO BRACKET (for Radio Receiver Type) |
Install the No. 1 radio bracket to the radio receiver with the 3 screws.
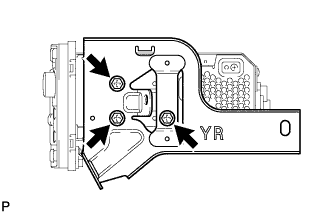 |
| 5. INSTALL RADIO AND DISPLAY RECEIVER ASSEMBLY WITH BRACKET (for Radio and Display Type) |
Connect all the connectors.
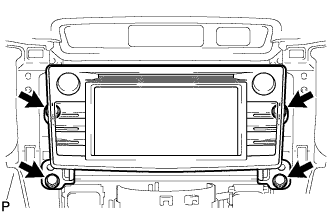 |
Install the radio receiver assembly with bracket with the 4 screws.
| 6. INSTALL RADIO RECEIVER ASSEMBLY WITH BRACKET (for Radio Receiver Type) |
Connect all the connectors.
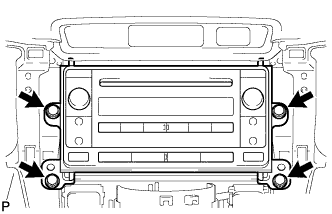 |
Install the radio receiver assembly with bracket with the 4 screws.
| 7. INSTALL CENTER INSTRUMENT CLUSTER FINISH PANEL ASSEMBLY |
for Manual Air Conditioning System:
Connect the connectors.
Attach the 4 claws to connect the air conditioner control.
Attach the 10 claws and 4 clips to install the center instrument cluster finish panel.
for Automatic Air Conditioning System:
Connect the connectors.
Attach the 8 claws and 4 clips to install the center instrument cluster finish panel.
| 8. CONNECT CABLE TO NEGATIVE BATTERY TERMINAL |
- NOTICE:
- When disconnecting the cable, some systems need to be initialized after the cable is reconnected (Click here).
