SHIFT LEVER ASSEMBLY > INSTALLATION |

for Preparation Click here
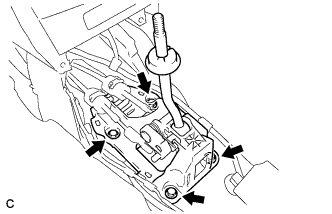
| 1. INSTALL SHIFT LEVER ASSEMBLY |
Install the shift lever assembly with the 4 bolts.
- Torque:
- 12 N*m{ 122 kgf*cm , 9 ft.*lbf }
 |
| 2. INSTALL TRANSMISSION CONTROL CABLE ASSEMBLY |
Rotate the transmission control cable nut counterclockwise approximately 180° and, while holding the nut in that position, push in the stopper until it makes 2 "click" sounds.
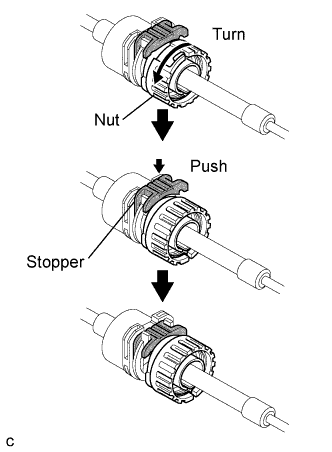 |
Install the outer part of the transmission control cable to the shift lever retainer, check that the position of the spring is the same as A shown in the illustration, and push in the stopper.
- HINT:
- If the stopper cannot be pushed in, slightly rotate the nut clockwise and then push in the stopper.
 |
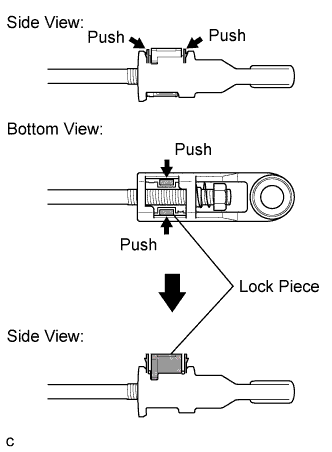
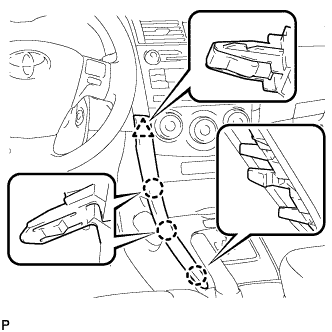
Push the two claws together at the top of the transmission control cable lock piece. While holding the two claws together, push the two lugs on the bottom of the lock piece toward each other and upward to pull out the lock piece.
 |
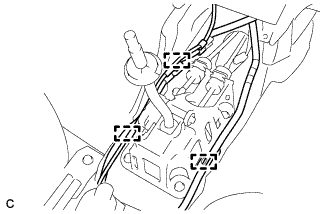
Install the transmission control shift cable to the shift lever assembly.
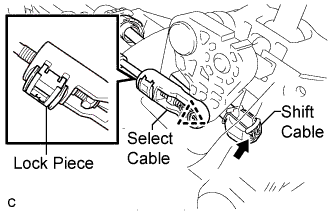 |
Install the control select cable to the shift lever assembly.
- NOTICE:
- Make sure to adjust the length at the neutral shift position.
- Make sure that the lock piece is protruding from the adjuster case.
Install the clip to the shift lever assembly.
Press in and lock the lock piece to the adjuster case.
- NOTICE:
- Securely press in the lock piece until the lock engages.
Install the wire harness to the shift lever assembly with the 3 clamps.
 |
| 3. ADJUST TRANSMISSION CONTROL SELECT CABLE |
Remove the console box assembly (Click here).
Remove the clip and disconnect the control select cable from the shift lever assembly.
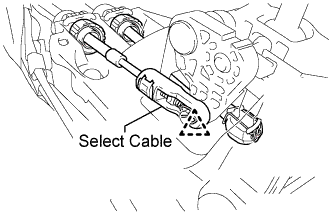 |
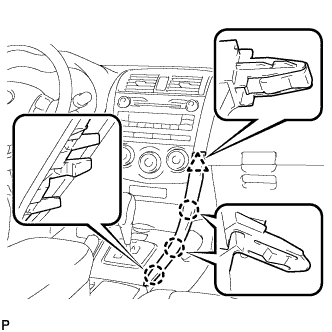
Push the two claws together at the top of the transmission control cable lock piece. While holding the two claws together, push the two lugs on the bottom of the lock piece toward each other and upward to pull out the lock piece.
|
Install the transmission control shift cable to the shift lever assembly.
|
Install the control select cable to the shift lever assembly.
- NOTICE:
- Make sure to adjust the length at the neutral shift position.
- Make sure that the lock piece is protruding from the adjuster case.
Install the clip to the shift lever assembly.
Press in and lock the lock piece to the adjuster case.
- NOTICE:
- Securely press in the lock piece until the lock engages.
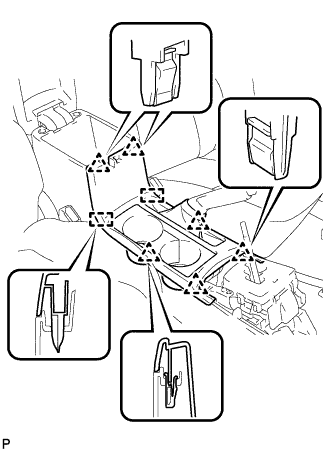
| 4. INSTALL CONSOLE BOX ASSEMBLY |
Install the 2 screws.
Install the console box assembly with the 2 bolts.
| 5. INSTALL CONSOLE BOX CARPET |
Install the console box carpet.
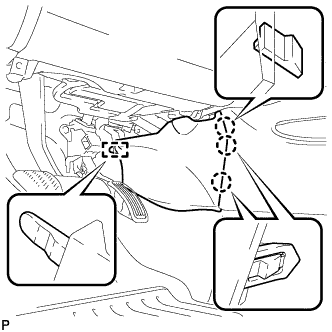
| 6. INSTALL UPPER CONSOLE PANEL SUB-ASSEMBLY |
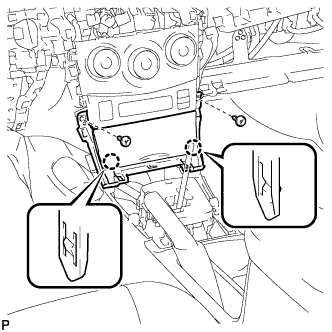
Engage the 6 clips and 2 guides to install the upper console panel sub-assembly.
 |
| 7. INSTALL FRONT NO. 1 CONSOLE BOX INSERT |
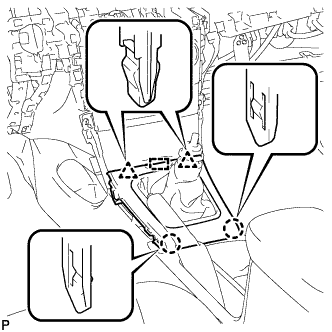
Engage the guide.
 |
Engage the 3 claws and install the front No. 1 console box insert.
| 8. INSTALL FRONT NO. 2 CONSOLE BOX INSERT |
Engage the guide.
 |
Engage the 3 claws and install the front No. 2 console box insert.
| 9. INSTALL INSTRUMENT PANEL BOX ASSEMBLY |
Connect the connector.
Engage the 2 claws.
 |
Install the instrument panel box assembly with the 2 screws <B>.
| 10. INSTALL CENTER NO. 1 INSTRUMENT CLUSTER FINISH PANEL ASSEMBLY |
Engage the guide.
 |
Engage the 2 claws and 2 clips, and install the center No.1 instrument cluster finish panel assembly.
| 11. INSTALL SHIFT LEVER KNOB SUB-ASSEMBLY |
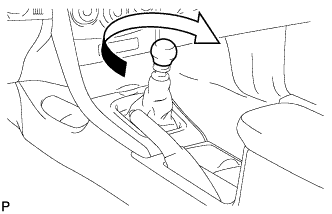
Turn the shift lever knob clockwise and install the shift lever knob sub-assembly.
 |
| 12. INSTALL LOWER INSTRUMENT PANEL FINISH PANEL LH |
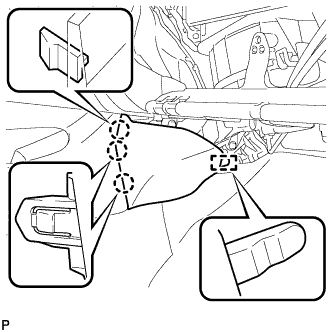
Engage the 3 claws and clip, and then install the lower instrument panel finish panel LH.
 |
| 13. INSTALL LOWER INSTRUMENT PANEL FINISH PANEL RH |
Engage the 3 claws and clip, and then install the lower instrument panel finish panel RH.
 |