TRANSMISSION CONTROL CABLE > REMOVAL |

for Preparation Click here
| 1. DISCONNECT CABLE FROM NEGATIVE BATTERY TERMINAL |
- NOTICE:
- When disconnecting the cable, some systems need to be initialized after the cable is reconnected (Click here).
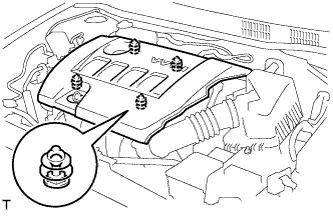
| 2. REMOVE NO. 2 CYLINDER HEAD COVER |
Hold the rear of the cover and raise it to disengage the 2 clips on the rear of the cover. Continue to raise the cover to disengage the 2 clips on the front of the cover to remove the cover.
- NOTICE:
- Attempting to disengage both front and rear clips at the same time may cause the cover to break.
 |
| 3. REMOVE BATTERY |
Disconnect the battery cables.
Remove the bolt and loosen the nut.
Remove the battery.
| 4. REMOVE BATTERY TRAY |
| 5. REMOVE BATTERY CARRIER |
Separate the 2 wire harness clamps from the battery carrier.
 |
Remove the 2 bolts.
 |
Separate the radiator pipe from the battery carrier.
Remove the 4 bolts and battery carrier.
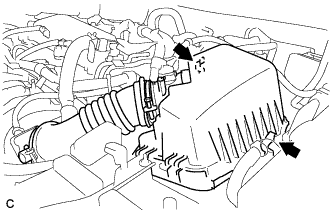
| 6. REMOVE AIR CLEANER CAP SUB-ASSEMBLY |
Disconnect the mass air flow meter connector and the 2 wire harness clamps.
 |
Disconnect the ventilation hose and loosen the hose clamp.
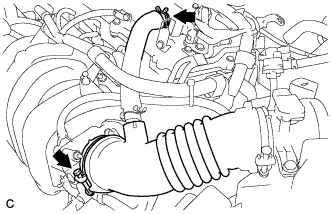 |
Release the 2 clamps and remove the air cleaner cap sub-assembly with hose.
 |
| 7. REMOVE AIR CLEANER CASE |
Separate the air cleaner filter element from the air cleaner.
Disconnect the engine wire harness clamp from air cleaner case.
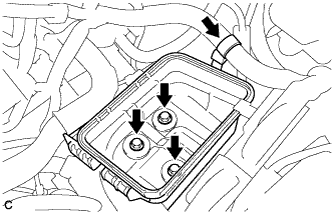 |
Remove the 3 bolts and the air cleaner case.
| 8. REMOVE FRONT EXHAUST PIPE ASSEMBLY |
Disconnect the heated oxygen sensor connector.
Remove the 4 bolts and 4 compression springs.
 |
Remove the front exhaust pipe assembly from the 2 exhaust pipe supports.
Remove the 2 gaskets.
| 9. REMOVE FRONT NO. 1 FLOOR HEAT INSULATOR |
Remove the 3 nuts and remove the No. 1 front floor heat insulator.
 |
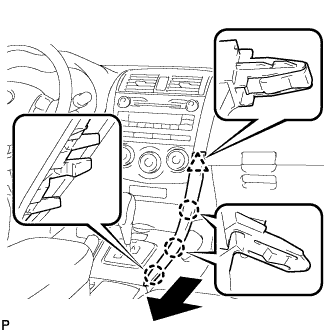
| 10. REMOVE LOWER INSTRUMENT PANEL FINISH PANEL LH |
Disengage the 3 claws and clip, and then remove the lower instrument panel finish panel LH.
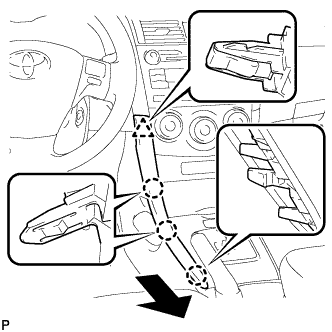 |
| 11. REMOVE LOWER INSTRUMENT PANEL FINISH PANEL RH |
Disengage the 3 claws and clip, and then remove the lower instrument panel finish panel RH.
 |
| 12. REMOVE SHIFT LEVER KNOB SUB-ASSEMBLY |
Turn the shift lever knob counterclockwise and remove the shift lever knob sub-assembly.
 |
| 13. REMOVE CENTER NO. 1 INSTRUMENT CLUSTER FINISH PANEL ASSEMBLY |
Disengage the 2 claws and 2 clips.
 |
Disengage the guide and remove the center No.1 instrument cluster finish panel assembly.
| 14. REMOVE INSTRUMENT PANEL BOX ASSEMBLY |
Remove the 2 screws <B>.
 |
Disengage the 2 claws.
Disconnect the connector and remove the instrument panel box assembly.
| 15. REMOVE FRONT NO. 1 CONSOLE BOX INSERT |
Disengage the 3 claws.
 |
Disengage the guide and remove the front No. 1 console box insert.
| 16. REMOVE FRONT NO. 2 CONSOLE BOX INSERT |
Disengage the 3 claws.
 |
Disengage the guide and remove the front No. 2 console box insert.
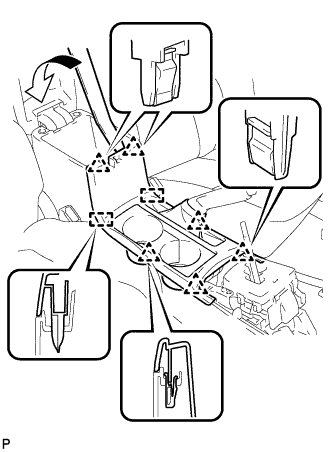
| 17. REMOVE UPPER CONSOLE PANEL SUB-ASSEMBLY |
Using a moulding remover, disengage the 6 clips and 2 guides, and remove the upper console panel sub-assembly.
 |
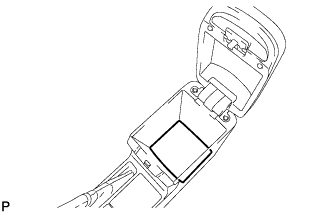
| 18. REMOVE CONSOLE BOX CARPET |
Remove the console box carpet.
 |
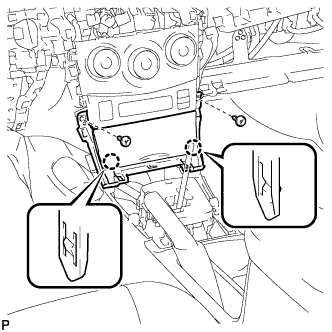
| 19. REMOVE CONSOLE BOX ASSEMBLY |
Remove the 2 bolts.
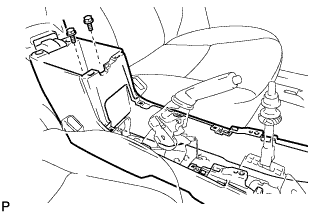 |
Remove the 2 screws and the console box assembly.
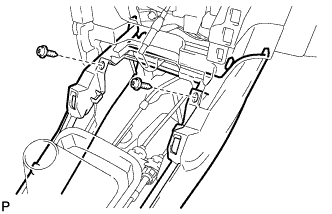 |
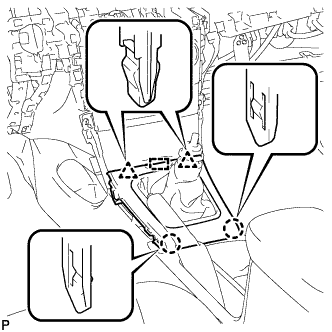
| 20. REMOVE TRANSMISSION CONTROL CABLE ASSEMBLY |
Disconnect the control shift cable from the shift lever assembly.
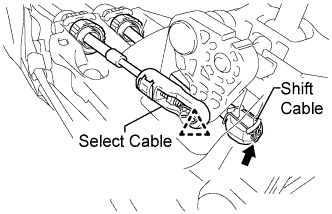 |
Remove the clip and disconnect the control select cable from the shift lever assembly.
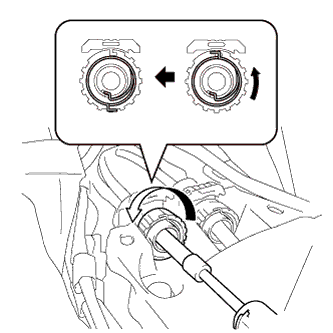
Using a screwdriver, pull out the stopper of the transmission control cable.
- NOTICE:
- Do not remove the stopper. If it is removed, reinstall it to its original position.
 |
Rotate the nut counterclockwise approximately 180° and, while holding the nut in that position, disconnect the transmission control cable from the shift lever retainer.
- NOTICE:
- Do not rotate the nut excessively as it may damage the internal spring and the transmission control cable will not be reusable.
 |
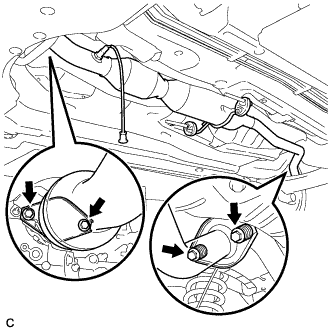
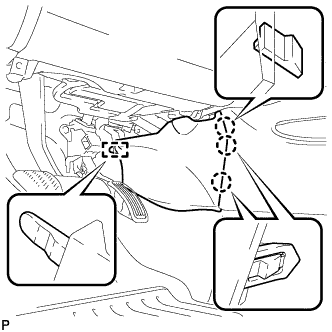
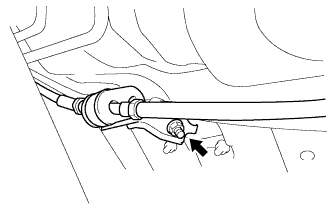
Remove the 2 clips and disconnect the 2 transmission control cables from the transaxle.
 |
Remove the 2 clips and disconnect the 2 transmission control cables from the control cable bracket.
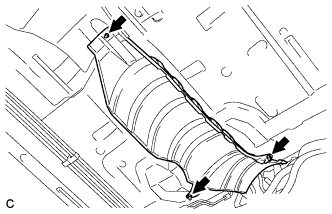
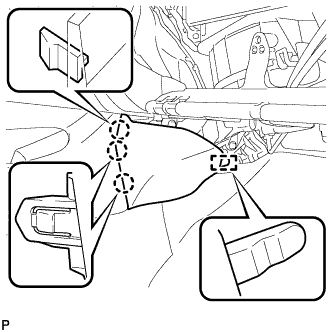
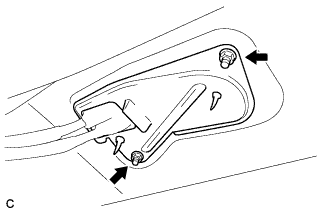
Remove the nut and transmission control cable assembly.
 |
Remove the 2 nuts and transmission control cable assembly.
 |