ECM > INSTALLATION |

for Preparation Click here
| 1. INSTALL ECM |
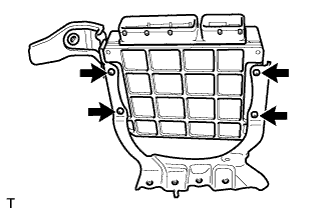
Install the bracket to the ECM with the 4 screws.
- Torque:
- 3.0 N*m{ 30 kgf*cm , 27 in.*lbf }
 |
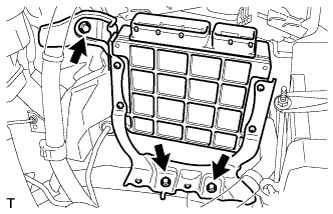
Install the ECM with the 3 bolts.
- Torque:
- 9.0 N*m{ 82 kgf*cm , 71 in.*lbf }
 |
| 2. CONNECT CONNECTOR |
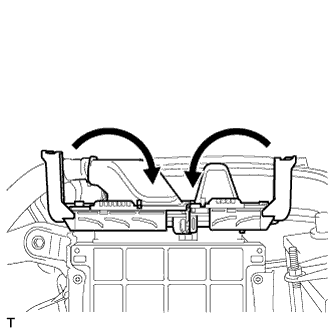
Connect the 2 ECM connectors.
- NOTICE:
- When connecting the connector, make sure that dirt, water and other foreign matter does not become stuck between the connector and other part.
Connect the 2 ECM connectors and lower the 2 levers.
- NOTICE:
- Make sure that the 2 levers are securely lowered.
 |
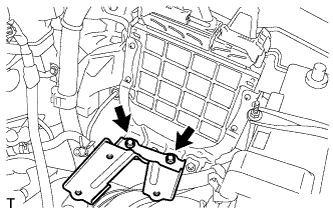
| 3. REMOVE AIR CLEANER BRACKET |
Install the air cleaner bracket with the 2 bolts.
 |
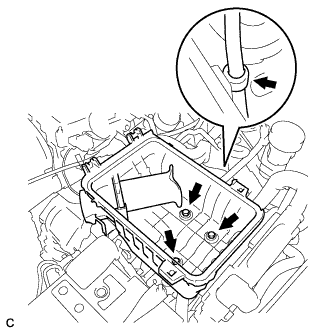
| 4. INSTALL AIR CLEANER CASE SUB-ASSEMBLY |
Install the air cleaner case with the 3 bolts.
- Torque:
- 5.0 N*m{ 51 kgf*cm , 44 in.*lbf }
 |
Connect the hose clamp.
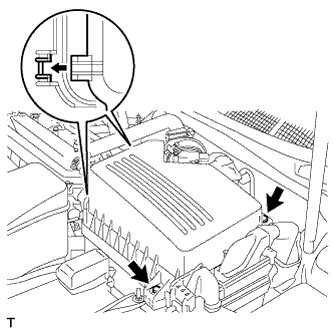
| 5. INSTALL AIR CLEANER CAP SUB-ASSEMBLY |
Install the air cleaner filter element onto the air cleaner case.
Insert the hinges. Install the air cleaner cap sub-assembly with the 2 bolts.
 |
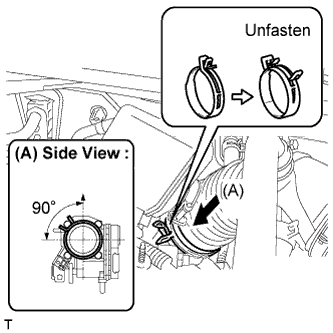
Align the matchmarks of the No. 1 air cleaner hose and throttle body, and then connect the air cleaner hose No. 1 to the throttle body and unfasten the No. 1 air cleaner hose clamp.
- NOTICE:
- Make sure that the hose clamp is at the correct angle.
 |
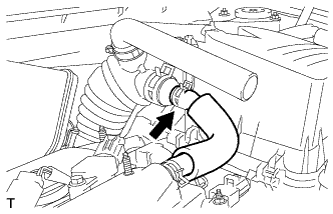
Connect the No. 2 ventilation hose to the air cleaner hose.
 |
Connect the purge line hose to the clamp (*1).
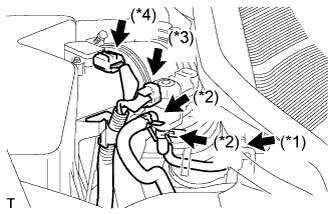 |
Connect the 2 purge VSV vacuum hoses (*2).
Connect the purge VSV connector (*3).
Connect the mass air flow meter connector (*4).
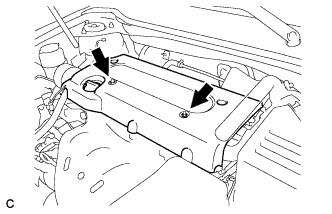
| 6. INSTALL NO. 1 ENGINE COVER SUB-ASSEMBLY |
Install the engine cover with the 2 nuts.
- Torque:
- 9.0 N*m{ 92 kgf*cm , 80 in.*lbf }
 |
| 7. RESET MEMORY |
When replacing the ECM, perform the RESET MEMORY procedure (A/T initialization) (Click here).